




Connect to Business Central
Connect to Dynamics 365 Business Central
Connect Dynamics 365 Business Central to your Expensify workspace to sync accounting data. Once connected, Expensify can import accounts, dimensions, vendors, and tax rates from Business Central and export approved reports back to it.
This integration supports Business Central only. To export expenses to Dynamics 365 Finance and Operations or other Microsoft Dynamics products, use a flat-file export instead. Learn more about indirect accounting integrations.
Who can connect to Business Central
To connect Business Central, you must:
- Be a workspace admin with a workspace on the Control plan.
- Have access to a Business Central environment where you can install extensions.
- Have access to Microsoft Entra to register an application and create a client secret.
- Have an admin account that can grant consent for the application.
How to prepare Business Central with Expensify Assisted Setup
Start with Expensify Assisted Setup, which appears after you install the Expensify app from Microsoft Marketplace. The wizard guides you through Microsoft Entra registration and registers the application in Business Central. You do not need to repeat the manual configuration steps after you complete the wizard.
For a video walkthrough, watch how to connect Business Central to Expensify. Recorded November 2026. The video shows the setup flow as of that date.
- Install the Expensify app published by Expensify from Microsoft Marketplace in your Business Central environment.
- In Expensify Assisted Setup, select Next to begin.
- Use the wizard’s link to open Microsoft Entra app registrations.
- Register a single-tenant application with the Web redirect URI
https://businesscentral.dynamics.com/OAuthLanding.htm. - Add the Business Central application permission
API.ReadWrite.All. - Grant admin consent for the permission.
- Create a client secret in the app registration with a Description, such as Expensify, and an expiration date.
- Save the secret Value in your password manager immediately. Do not use the Secret ID.
- Copy the Application (client) ID from the app registration’s Overview page.
- Return to Expensify Assisted Setup and enter this value in the Client ID field.
- Select Register in Business Central.
- If you did not already grant admin consent in Entra, select Grant Consent.
- If prompted, complete the admin sign-in and consent process.
- Select Next.
- Copy the Tenant ID and exact Environment name shown in the wizard.
- Complete the remaining setup for the journal batch, templates, and number series.
- Finish the wizard.
Keep the Tenant ID, Environment name, Client ID, and client secret Value for the connection in Expensify.
Next, connect Business Central to Expensify with these values. For setup without the wizard, use the manual configuration sections later in this guide.
How to connect Business Central to Expensify
- In the navigation tabs (on the left on web, on the bottom on mobile), select Workspaces > [workspace name] > Accounting.
- Next to Dynamics 365 Business Central, select Connect.
- On the Before you connect… page, confirm you’ve completed the required Business Central setup, then select Next.
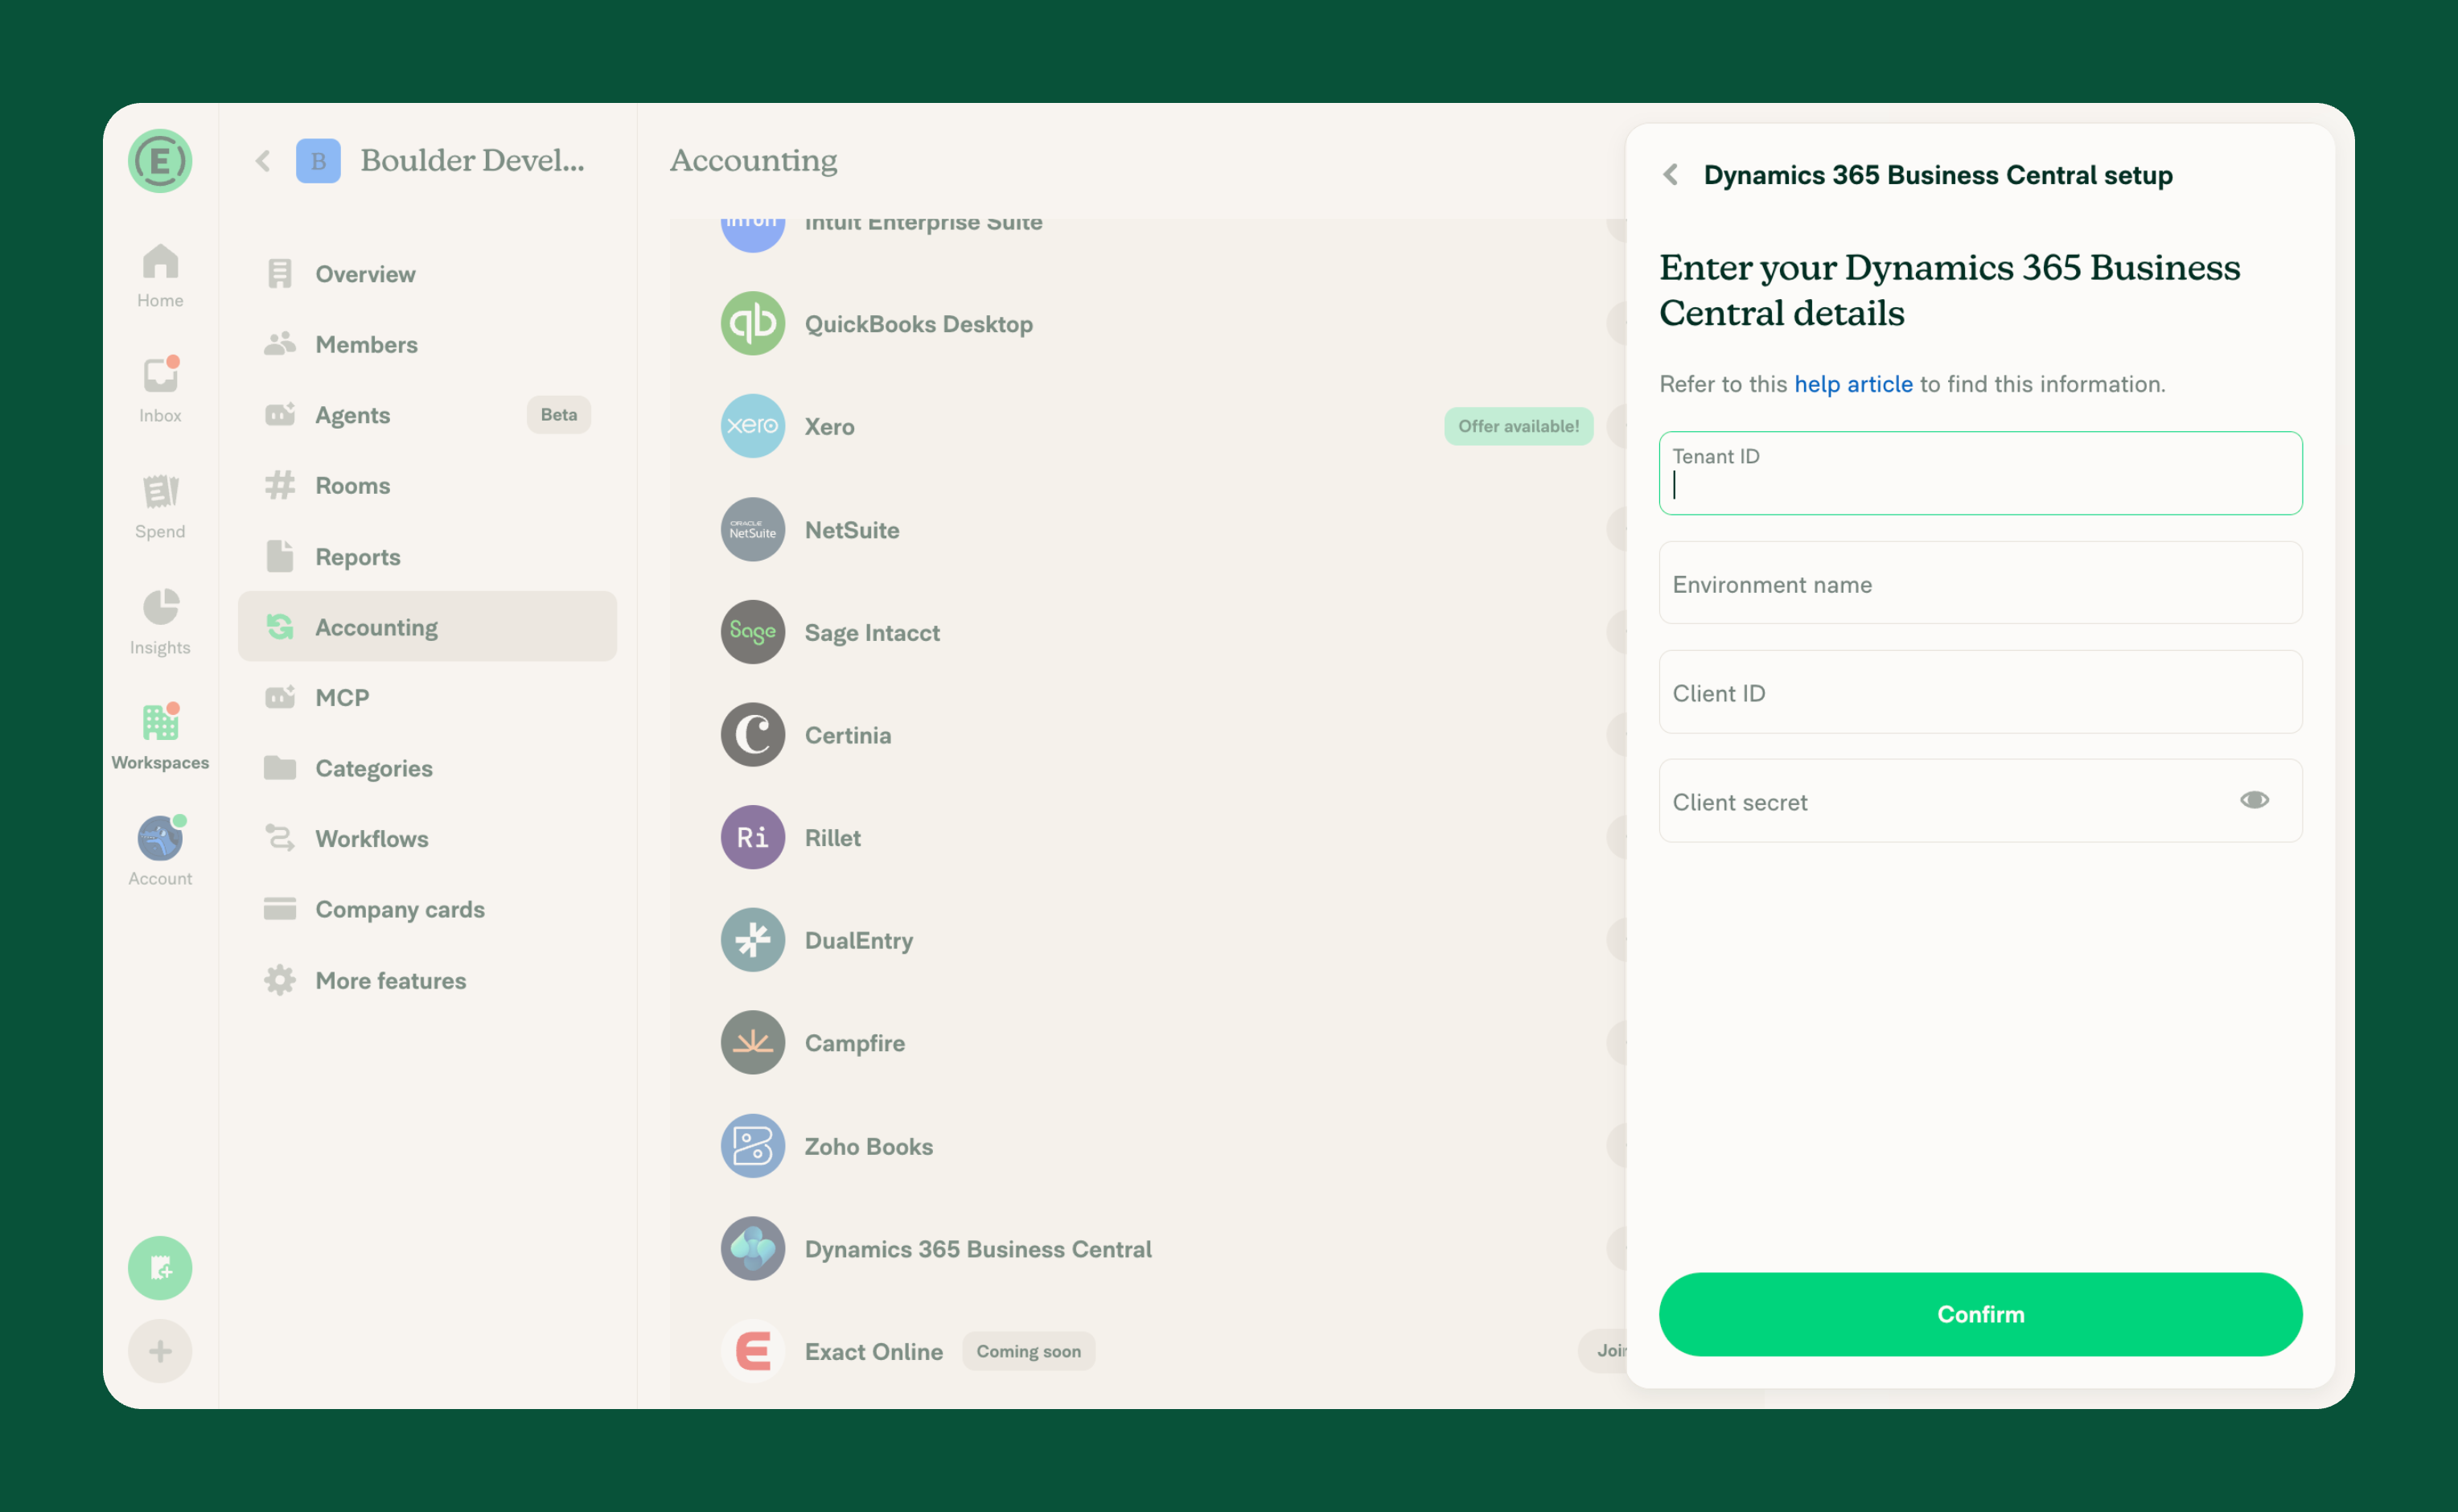
- Enter your credentials in the following fields:
- Tenant ID: The Directory (tenant) ID from your Microsoft Entra app registration.
- Environment name: The exact name of your Business Central environment, such as Production.
- Client ID: The Application (client) ID from your Microsoft Entra app registration.
- Client secret: The secret Value, not the Secret ID.
- Select Confirm.
Expensify verifies your credentials and connects to Business Central.
Your Client secret is encrypted and stored on Expensify’s servers. It isn’t displayed in the app or stored on your device.
How to choose which Business Central subsidiary to sync
After connecting, Expensify selects a Business Central subsidiary to sync with your workspace. If your Business Central environment has multiple subsidiaries, you can choose which one to use.
To change the selected subsidiary:
- In the navigation tabs (on the left on web, on the bottom on mobile), select Workspaces > [workspace name] > Accounting.
- Select Subsidiary.
- Choose the Business Central subsidiary you want to sync.
The selected subsidiary appears under Subsidiary on the Accounting page.
What happens after you connect to Business Central
After connecting, Expensify runs the first sync and imports your Business Central accounts as categories.
On the Accounting page, you can see:
- The selected Business Central company under Subsidiary.
- The time of the last sync.
- Import, Export, and Advanced settings for managing the integration.
To customize which data syncs and how reports export, learn how to configure Business Central settings.
How to disconnect Business Central
To stop syncing Business Central with your workspace:
- In the navigation tabs (on the left on web, on the bottom on mobile), select Workspaces > [workspace name] > Accounting.
- Select More (⋮) next to Dynamics 365 Business Central.
- Select Disconnect.
- Select Disconnect again to confirm.
Disconnecting stops syncing with Business Central and removes the connection from your workspace.
How to create the Microsoft Entra app registration manually
Use this alternative if you configure the connection without Expensify Assisted Setup. If you completed the wizard, skip both manual configuration sections.
Use an account with the Application Administrator, Cloud Application Administrator, or Global Administrator role to grant admin consent for Business Central in Microsoft Entra.
- In the Microsoft Entra admin center, go to App registrations > New registration.
- Enter Expensify as the name.
- For the supported account type, choose Accounts in this organizational directory only.
- Under Redirect URI, select Web.
- Enter
https://businesscentral.dynamics.com/OAuthLanding.htmas the redirect URI. - Select Register.
- On the Overview page, copy the Application (client) ID and Directory (tenant) ID.
- Go to Certificates & secrets > New client secret.
- Enter a Description, such as Expensify.
- Choose an expiration date for the secret.
- Select Add.
- Copy the secret Value immediately. Entra hides it after you leave the page. Do not use the Secret ID.
- Go to API permissions > Add a permission > Dynamics 365 Business Central > Application permissions.
- Select
API.ReadWrite.All. - Select Add permissions.
- Select Grant admin consent for your tenant.
- Confirm that the permission status shows Granted.
Client secrets expire after six months by default, with a maximum lifetime of 24 months. Your organization can require a shorter lifetime. Set a reminder to rotate the secret before its expiration date.
How to register the application in Business Central manually
Use these steps only for manual configuration, after you create the Microsoft Entra app registration.
- Install the Expensify extension from Microsoft Marketplace in your Business Central environment.
- Complete the extension setup, including the journal batch, templates, and number series Expensify will use to create records.
- Search for Microsoft Entra Applications in Business Central.
- Select New.
- Enter the Application (client) ID from Entra in the Client ID field.
- Set Description to Expensify.
- Set State to Enabled.
- If the App Name field is available, optionally select Expensify.
- Under User Permission Sets, add
EXY FULLACCESS. - If you haven’t already granted admin consent in Microsoft Entra, select Grant Consent and sign in with your admin account. Otherwise, skip this step.
- Note your Business Central environment name exactly as it appears, such as Production.
You need the environment name, Directory (tenant) ID, Application (client) ID, and secret Value to connect your workspace.
FAQ
Where can I download the Expensify extension for Dynamics 365 Business Central?
You can install the Expensify extension from Microsoft Marketplace. You’ll need access to a Business Central environment where you can install extensions.
What information do I need to connect Business Central to Expensify?
You’ll need the following information:
- Tenant ID: Your Microsoft Entra tenant ID.
- Environment name: Your Business Central environment name, such as Production.
- Client ID: The application ID from your Microsoft Entra app registration.
- Client secret: The client secret from that app registration.
You must also install and configure the Expensify extension in Business Central before connecting.
Can I connect other Microsoft Dynamics products to Expensify?
The direct integration only supports Dynamics 365 Business Central. To export expenses to Dynamics 365 Finance and Operations or other Microsoft Dynamics products, use a flat-file export instead. Learn more about indirect accounting integrations.
Why don’t I see tax settings after connecting?
Expensify only displays Taxes when your Business Central company has VAT posting setups. US companies typically don’t have VAT posting setups, so tax settings may not appear.
Which client secret value do I use?
Use the secret Value from Certificates & secrets in your Microsoft Entra app registration. The Secret ID does not work as a client secret.
Entra only shows the Value when you create the secret. If you did not save it, create a new secret.
Why does Grant Consent say “Need admin approval”?
Your account can lack the admin role required to grant consent.
- In the Microsoft Entra admin center, go to Users > [user] > Assigned roles.
- Confirm that your account has the Application Administrator, Cloud Application Administrator, or Global Administrator role, or ask your tenant administrator to grant consent.
A tenant created through a Business Central trial sign-up can have no administrator. For an unmanaged tenant, complete an admin takeover in the Microsoft 365 admin center before you grant consent.
What does “AADSTS500113: No reply address is registered” mean?
The app registration needs a Web redirect URI for Business Central consent.
- In Microsoft Entra, open the Expensify app registration.
- Go to Authentication > Add a platform > Web.
- Enter
https://businesscentral.dynamics.com/OAuthLanding.htmas the redirect URI. - Save the change.
- In Business Central, select Grant Consent again.
How do I fix a Business Central authentication error?
An authentication error can mean a credential is incorrect, or your Client secret expired or changed.
Before you create a new Client secret, confirm these values:
- Tenant ID is the Directory (tenant) ID, not the Object ID.
- Client ID is the Application (client) ID, not the Secret ID.
- Client secret is the secret Value, with no extra spaces.
- Environment name matches Business Central exactly, for example Production.
If the values are correct but authentication still fails, update your credentials:
- Create a new Client secret in the Microsoft Entra app registration used for Expensify.
- In the navigation tabs (on the left on web, on the bottom on mobile), select Workspaces > [workspace name] > Accounting.
- Select More (⋮) next to Dynamics 365 Business Central.
- Select Enter your credentials.
- Enter your updated credentials, then select Confirm.
Why does the subsidiary picker show “No companies found”?
This message means Expensify couldn’t find a company in your Business Central environment.
Check that your Business Central environment contains a company. If necessary, add one in Business Central.
Then, in Expensify:
- In the navigation tabs (on the left on web, on the bottom on mobile), select Workspaces > [workspace name] > Accounting.
- Select More (⋮) next to Dynamics 365 Business Central.
- Select Sync now to try syncing again.


